
Create high-quality images and GIFs with Asymptote
Have you have ever wanted to create a GIF like this one1?
These kinds of images and representations are often useful, for example, to convey an idea to the public during a presentation. In fact, I embedded this animation in a slide used to present a paper that was about stencil computations.
This tutorial will guide you step-by-step to end up with that nice GIF. Along the way, you will learn basic “building blocks” you can reuse to create many different things.
We are going to use Asymptote, a powerful language to create vector graphics with a C++-style syntax. After installing it, you should be able to compile .asy file using the asy tool.
Step 1: Creating the grid
We start by declaring two integer variables to hold the number of rows and columns. Then, we can use draw() to draw the external rectangle for our grid.
That rectangle is obtained using box() supplying the bottom-left coordinate, (0, 0) for convenience, and the top-right one.
Moreover, to draw it with a thicker pen we pass black+2 as the second parameter.
unitsize(3cm);

int rows = 5;
int cols = 7;

// External rectangle
draw(box((0, 0), (cols, rows)), black+2);
You may have noticed the use of unitsize(): it comes handy to define how “big” a unit in our space actually is.
You can experiment with multiple options and you might also want to tweak the default font size using defaultpen().
Now we can also draw the internal lines for our grid. In order to do that simply, we exploit two for loops to draw with the default black pen lines
from the left to the right and from the bottom to the top. In Asymptote, a line is represented as start -- end, with start and end being coordinates.
// Horizontal lines
for (int i = 1; i < rows; ++i)
    draw((0, i) -- (cols, i));

// Vertical lines
for (int i = 1; i < cols; ++i)
    draw((i, 0) -- (i, rows));
If we now compile our .asy file, it should look like this:

Step 2: Adding numbers
Those empty cells look really lonely: it’s time to add some numbers. Just for fun, let’s add random numbers.
There’s a handy function unitrand() which returns a random decimal number between 0 and 1.
Two nested for loops help us quickly achieve the goal, considering each cell and invoking
the function label to place the number (formatted using the standard printf notation) exactly in the middle of it.
srand(seconds());  // random seed
for (int i = 0; i < rows; ++i) {
    for (int j = 0; j < cols; ++j) {
        real n = unitrand() * 10;  // between 0.0 and 10.0
        label(format("%#1.2f", n), (j + 0.5, i + 0.5));
    }
}
Automatic centering does the rest of the job and we end up with this image:

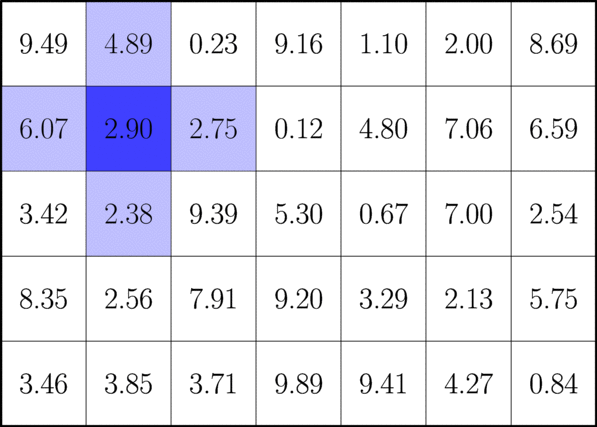
Step 3: Adding colors
Let’s add some colors to this sad monochromatic image. We can use the fill(area, color) function in a way very similar to the draw() one used in the first step.
This time the rectangle has the bottom-left corner at (col_focus, row_focus) and its sides have length 1.
int row_focus = 1;
int col_focus = 2;

// Color the focused cell in blue
fill(box((col_focus, row_focus), (col_focus + 1, row_focus + 1)),
     mediumblue);
Using a for loop and two arrays to describe the offsets per direction, we can also quickly color in a lighter blue the 4 neighbors of the focused cell.
// Color its 4-neighbors in light blue
int[] row_delta = {0, 0, -1, 1};
int[] col_delta = {-1, 1, 0, 0};
for (int i = 0; i < 4; ++i) {
    int row = row_focus + row_delta[i];
    int col = col_focus + col_delta[i];
    fill(box((col, row), (col + 1, row + 1)), paleblue);
}
Beware: these lines must be placed before the ones from the previous steps, otherwise they would cover both the grid borders and the numbers. Instead, we want these colored rectangles to serve as a background.
This is the cool result:

Step 4: Refactoring
To create the animation in the next step, we must do some housekeeping here. We need to place the grid rendering inside a dedicated function, to be called with the coordinates of the focused cell. It might look like this:
void render_grid(int row_focus, int col_focus) {
    // Add a random number in the middle of each cell
    ...
    // Color the focused cell in blue
    ...
    // Color its 4-neighbors in light blue
    ...
    // Grid (external rectangle, horizontal and vertical lines)
    ...
}
To display the grid we can now simply call render_grid(1, 2) with arbitrary parameters. What is still not so nice is that random values change at every call.
One way to fix this is to pre-compute random numbers and store them in a global array; the function will then use those numbers instead of generating them on the spot.
real[] values;  // global array to keep random values
for (int i = 0; i < rows*cols; ++i)
    values.push(unitrand() * 10);


void render_grid(int row_focus, int col_focus) {
    // Add a random number in the middle of each cell
    for (int i = 0; i < rows; ++i) {
        for (int j = 0; j < cols; ++j) {
            real n = values[i * cols + j];  // taken from array
            label(format("%#1.2f", n), (j + 0.5, i + 0.5));
        }
    }
    ...
}
While there is no visual change in the image after this step, we have prepared our code which is ready for the grand finale!
Step 5: Animating
It’s time to import the animation module to create our GIF!
import animation;After creating an animation object, we iterate over each non-boundary cell and call the function to render the grid with that cell as the focused one.
Using a.add() we add to the animation what is “currently” being visualized and with erase() we immediately clean everything.
While more advanced features exist (for instance, it would be nice not to clear and redraw everything from scratch each time), these simple ones suffice to create the GIF.
animation a;
for (int i = rows - 2; i >= 1; --i) {
    for (int j = 1; j < cols - 1; ++j) {
        render_grid(i, j);
        a.add();
        erase();
    }
}
The final line produces the GIF, repeating the loop an infinite number of times and using 600 milliseconds between each frame. The density option2 is used to create a high-quality GIF.
a.movie(delay=600, options="-density 288");As promised, here’s the beautiful result (you can download the final .asy:
Not bad, right? I hope this inspired you to create cool images and animations, and gave insights on a way to actually produce them!
-
The GIF shows a stencil operator applied to non-boundary cells of a grid. ↩︎
-
Options are passed to imagemagick which is used for combining frames into a single GIF. Here 288 is used as it is four times the standard density (72 dpi). You can then obviously scale down the final result, if you need. ↩︎